


Web application Deployment
In the last tutorial we installed Eclipse IDE for Java EE Developers, we created a project (login example of the last tutorial) and we executed it. In this tutorial we will see how this mecanism works and the deployment of an application in a production server.
What is the Deployment of an application?
To be able to run the application in the first tutorials, we copied by hand all the files of the web application to the webapps folder of the Tomcat server. This action of copying the files to this directory is known as "Web Application Deployment".
When we work on a J2EE web project we do it with a development tool like Eclipse and to run the application the tool does an automatic deployment to be able to make tests in a quick way.
When we finish the application, the deployment will be done on a production server. This server is the one the web application users will use. This deployment will be done using a WAR file.
Automatic deployment in Eclipse IDE for Java EE Developers
In the last tutorial we said that when we execute, the following steps are done:
- Publish our application in Tomcat. Step known as Deployment.
- Start the Tomcat server
- Open a browser or internal http client pointing to http://localhost:8080/first-jee/login
The first thing you would think is that in the first step, eclipse publishes the content of the folders Java Resources and WebContent in the Tomcat directory webapps. The reality is a bit more complicated. Eclipse publishes a temporal directory inside the workspace. In my case
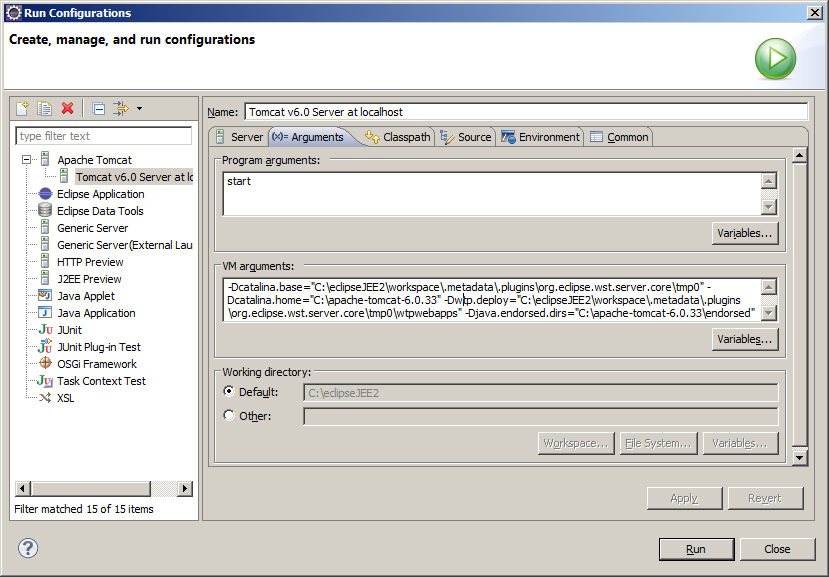
How is that Tomcat executes the web application if it isn´t in webapps? The response is that eclipse starts Tomcat with the following instruction:
This can be seen clicking on the menu Run - Run Configurations ...
Deployment using WAR file
A WAR file is a compressed file including all the files which until now were deployed manually in webapps. This file, internally, has the same structure as the one we had used before: WEB-INF directory, lib, classes, etc. To deploy a WAR in Tomcat, you only have to copy it to the webapps directory.
A good reason to use *.war files is that normally, the application development teams and the installation ones are composed of different people. Send just one file to deploy is easier than send several.
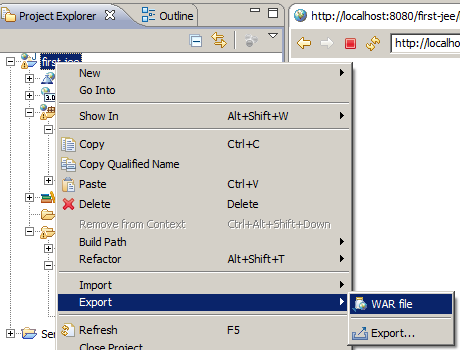
Eclipse JEE allows the generation of the WAR file of the application, selecting the project and clicking with the right button of the mouse on - Export -WAR file
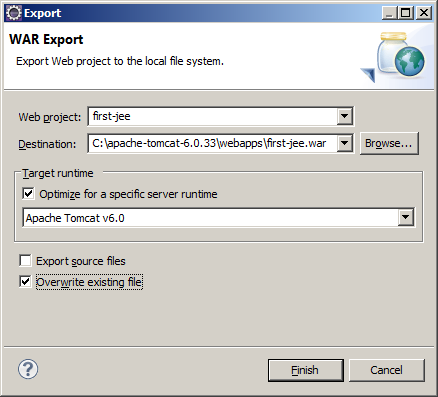
In Destination I write the place where I want to leave the WAR file. In my case I leave it directly in the webapps directory of the Tomcat installation.
To test the application I only have to start Tomcat executing
C:\apache-tomcat-6.0.33\bin\start.bat
and then open a browser with
http://localhost:8080/first-jee/login.html
in the url, by default, we write the name of the WAR without the extension: first-jee.
In the next tutorial we are going to see how to make a JSP with the facilities given by Eclipse JEE.
| << Use of Eclipse IDE for Java EE Developers | Introduction to Java Server Pages JSP >> |