


Use of Eclipse IDE for Java EE Developers
Up until now we have been using Eclipse Classic to compile servlets and we copied the *.class files manually into the folder /WEB-INF/classes. So that the changes are updated we restart the Tomcat server manually. In this tutorial, we will see how to simplify this process using Eclipse para java EE. This version also includes, html and jsp editors, which make the job with this type of files, easier.
Download and install Eclipse IDE for Java EE Developers
The first thing we are going to do download Eclipse IDE for Java EE Developers and install it in our computer. Download the *.zip file and decompress it in a folder. Inside de installation directory (in my case C:\eclipseJEE2) we execute eclipse.exe and indicate the workspace (in my case C:\eclipseJEE2\workspace\), which is the directory where we want to work.
Register the Tomcat server in Eclipse
We then look for the servers view to register the Tomcat server we are using. In the contextual menu(right mouse button over the view), we choose new server which takes us to a window where we choose the server we want to add.
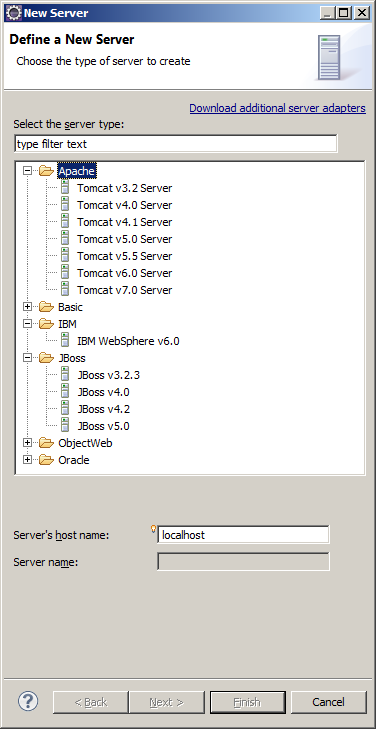
Among the servers we can see the servlets containers we´ve talked about before (WebSphere, JBoss, etc). We choose Tomcat versión 6, which is the one we use for this tutorial and we will see a window as the one below.
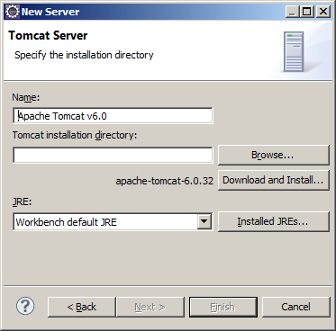
We click the button Browse and we select the directory where our Tomcat installation is and we click in Finish.
Now we can see the Tomcat server in the server view and also a new project called Servers where we can also see our Tomcat server..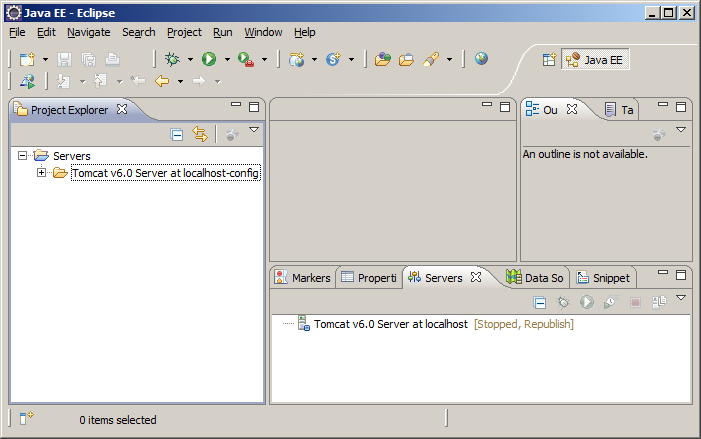
Create a Web project called first-jee
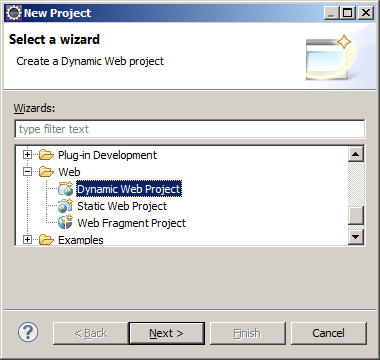
In the Project Explorer view, right button on the mouse- new- project.
In the new project window, inside the Web folder, we select Dynamic Web Project.
As you can see in the window; New Dynamic Web Project apache tommcat 6, has already been selected as our target runtime. If we had another server installed as JBoss and we were going to work with JBoss we would change the target to JBoss.
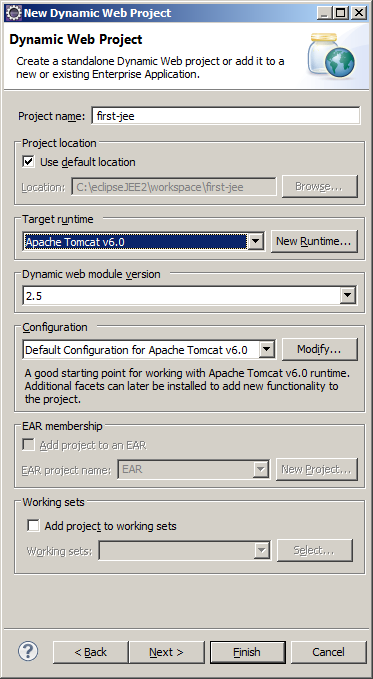
To keep this tutorial simple we will ignore the rest of the configurations, we fill Project name with first-jee as the name of our project and we click on finish.
Project structure
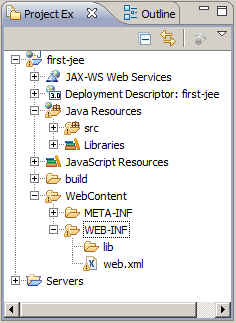
In the projects view we can see the structure of the project we have just created. There are two folders which are interesting for us:
- Java Resources: in here we have all the *.java files and eclipse will be in charge of publicating, automatically, the *.class where they correspond.
- WebContent: here we have the *.html, *.jsp files, etc. Inside this folder we can see the J2EE standard structure for a project; the folder WEB-INF, the web.xml file, etc.
Copy the last example and execute it
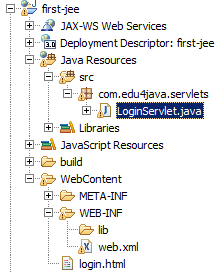
We are going to repeat the last tutorial using this eclipse. For this we are going to copy the web.xml, login.html and LoginServlet.java files from the last tutorial Parameters, GET and POST methods in Servlets to our project. In the graphic below we can see how the project will look like.
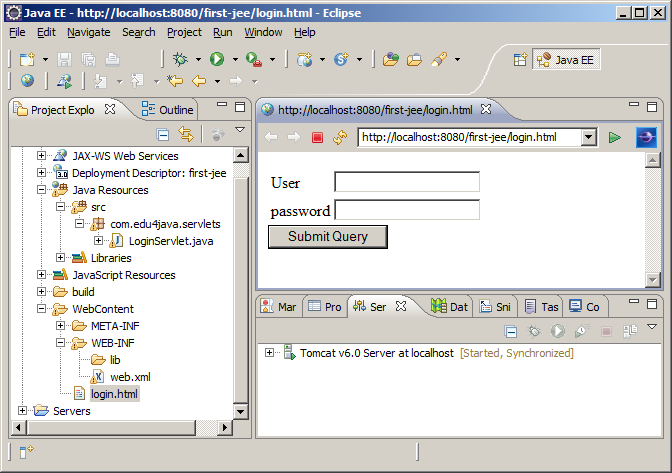
Lastly we click on the right button of the mouse over login.html - Run as - Run on Server and the Run On Server window will appear.
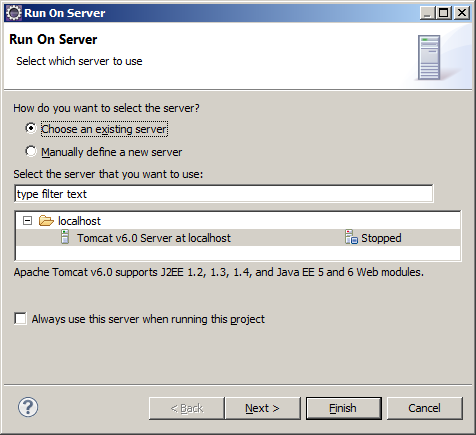
Click on finish and we obtain:
What happened here? magic ;) after clicking on finish, eclipse did the following:
- Publish our application in Tomcat. Step known as Deployment.
- Start the Tomcat server
- Open a browser or internal http client pointing to http://localhost:8080/first-jee/login
If we fill in the user and password with edu4java and eli4java respectively and we click on Submit Query, we obtain:
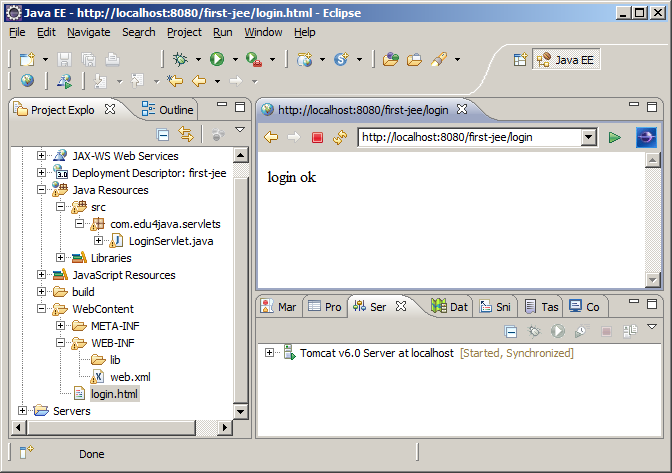
In the following tutorial we will see more on how JEE eclipse works...
| << Parameters, GET and POST methods in Servlets. | Web application Deployment >> |