


Installing the Android SDK and ADT plugin for Eclipse
In this tutorial we will learn how to prepare a development environment for Android applications using Eclipse IDE.
Installing the Android SDK
On the Android website there are several options for downloading the Android SDK development tools. At the time I am writing this tutorial, options are:
- Eclipse ADT: A package of the Eclipse Juno version with the ADT plugin installed, which comes with an Android SDK. (The advantage is that the installation is faster).
- Android Studio: it is an adapted version of IntelliJ for Android.
- Stand-alone SDK Tools: Consisting only of the Android SDK. (This is the preferred choice of Android developers in general but not for Google which has the option somewhat hidden).
In this tutorial we will install stand-alone SDK, Eclipse Kepler and finally the Eclipse plugin.
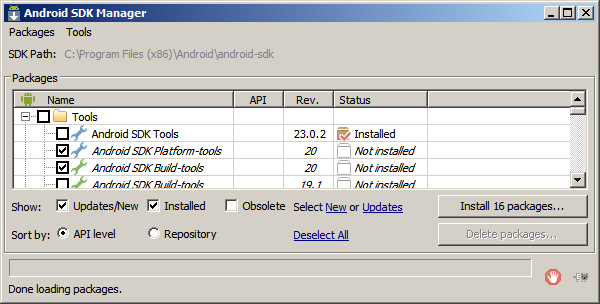
We download the SDK and install it in our PC. We run the SDK manager and download the packages selected by default.
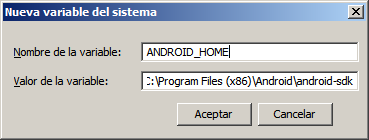
ANDROID_HOME Environment variable
It is important for many tools (e.g. Gradle) to define the ANDROID_HOME variable with the directory where you installed the SDK. (any doubt go to Windows and MS-DOS Environment variables)
Installing Eclipse and Android ADT plugin
We look for "eclipse download" in google and navigate to find "Eclipse IDE for Java Developers" but instead of the latest version, look for the one called "Kepler". Chose "Kepler" as there are conflicts between Eclipse later versions and plugins used for developing Android and Java in general like Gradle, Libgdx and others.
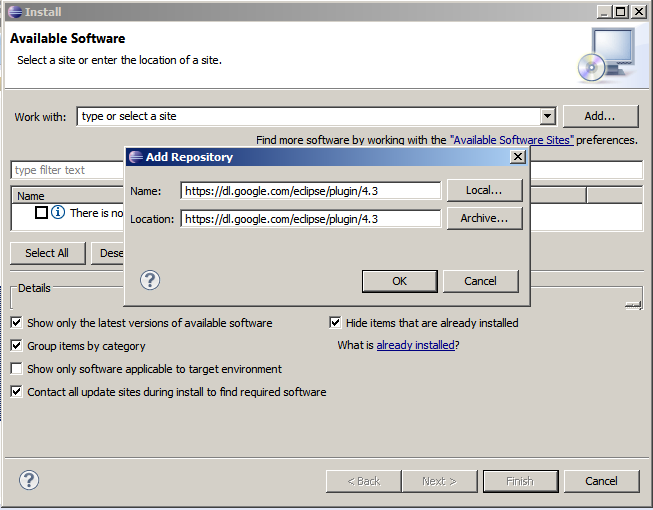
We download Eclipse Kepler, unzip it in the folder you want and start eclipse.exe. After indicating in which directory we want to set the workspace, go to the Help menu - Install new Software. Add ADT "https://dl.google.com/eclipse/plugin/4.3" using "Google Plugin for Eclipse".
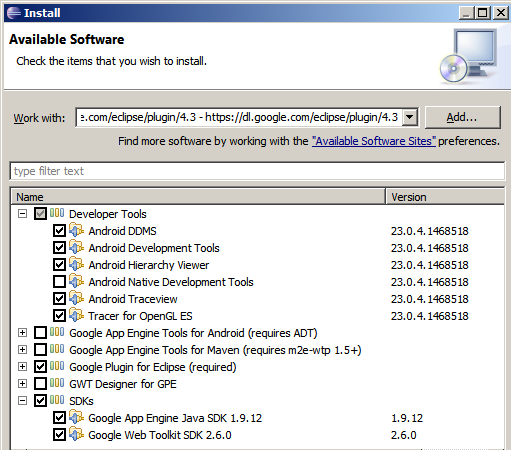
We select all options in "Development Tools" except "Native Development Tools".
With this, we have all we need for Android development but I suggest downloading "Google Plugin for Eclipse" and the SDKs for App Engine and GWT. In the future I will convince you to use them.
App Engine is a free server for Java which is very convenient for Android or Web applications. GWT is a tool for developing in Java which is compiled into HTML5. If we use Libgdx to develop in Android, we will have an HTML5 version with almost no extra work.
How to create an Android project in Eclipse and run it
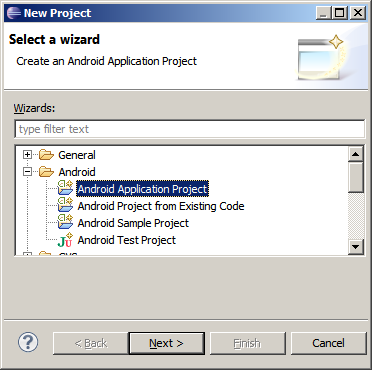
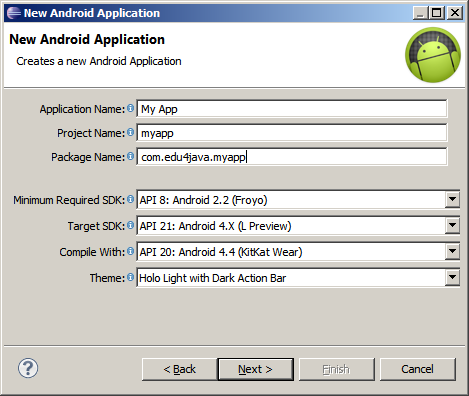
Once the plugin is installed, you can create an Android project just going to File - New - Project and select Android Application Project.
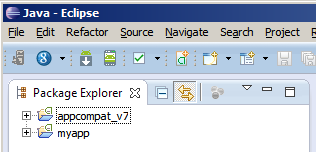
It is convenient to choose API 8 so that our program works in more than 95% of existing Androids devices. The project generator includes in the Activity created, the use of the "Actions Bars". The Action Bars are supported by default from the Android API version 15 onwards. To resolve this incompatibility the Activity inherits from android.support.v7.app.ActionBarActivity and a appcompat_v7 project is created.
Test the Android application using the Apk File
This is a quick solution when we have problems connecting our device our when we want the opinion of a friend. Simply run our application in Eclipse on a real or virtual device to create an apk file. We can find this apk file in the bin folder inside our Android project after execution.
If you do not have a real device you can create a virtual one in the emulator. We can send the Apk file generated by mail, Bluetooth, USB, wifi, etc.
To run an Apk which is not coming from Google Play you need:
- Settings - Applications - Unknown sources (Galaxy S2)
- Settings - Security - Unknown Origin (Asus Transformer Prime)
- Config. - More - Security - Unknown Origin (Galaxy S4)
| << Index | Components and Project Structure >> |